Getting Started with DonorLog
Welcome to DonorLog! This guide will help you get started with managing your donations, donors, and campaigns effectively.
What is DonorLog?
DonorLog is a comprehensive donation management system designed for nonprofits, charities, and religious organizations. It helps you:
- Manage Donors - Keep track of all your donors and their contact information
- Record Donations - Easily record and track all donations with multiple payment types
- Manage Pledges - Track recurring donation commitments and payment schedules
- Create Campaigns - Organize fundraising campaigns and track progress
- Generate Tax Receipts - Automatically generate CRA-compliant tax receipts
- Send Emails - Communicate with donors via email with customizable templates
New to DonorLog? Pick the path that best describes your role:
- Administrators: Focus on user management and system settings
- Fundraisers: Start with creating campaigns and tracking donations
- Volunteers: Learn about adding donors and recording donations
Logging In
- Navigate to your DonorLog website
- Enter your username and password
- Click "Login"
You'll be taken to the main dashboard where you can see an overview of your donations and campaigns.
If this is your first time logging in, your administrator will provide you with login credentials. Make sure to change your password after the first login for security.
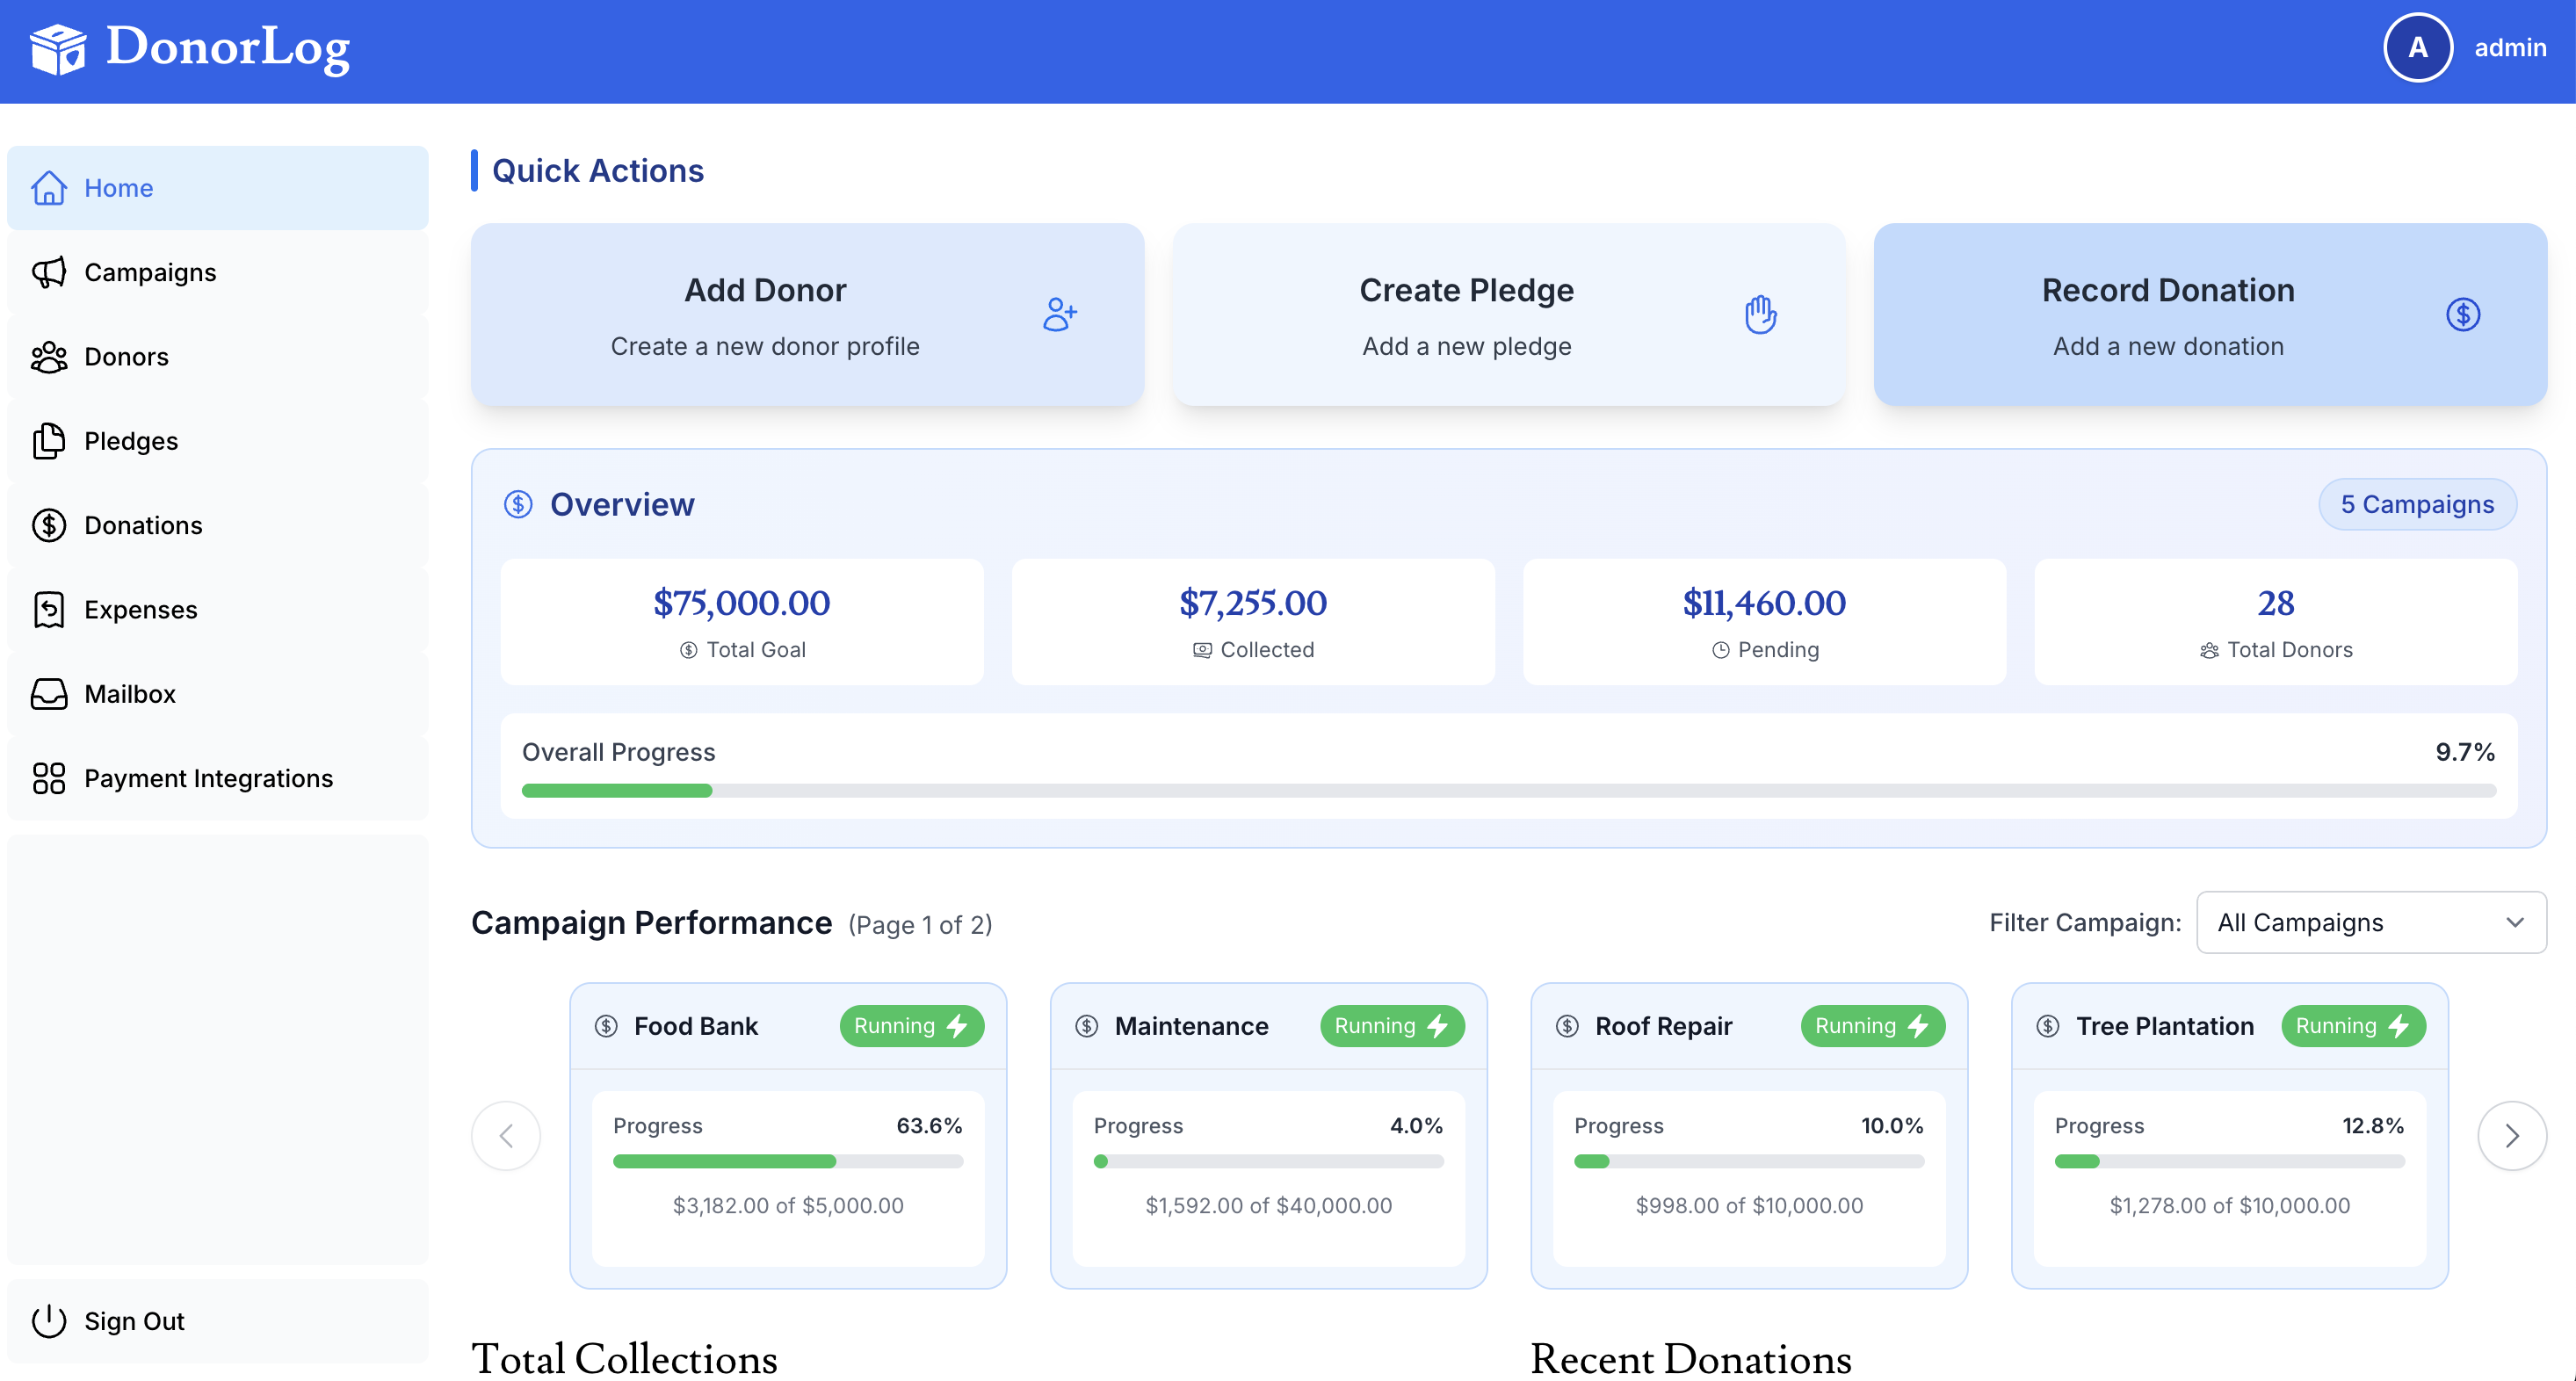
Dashboard Overview
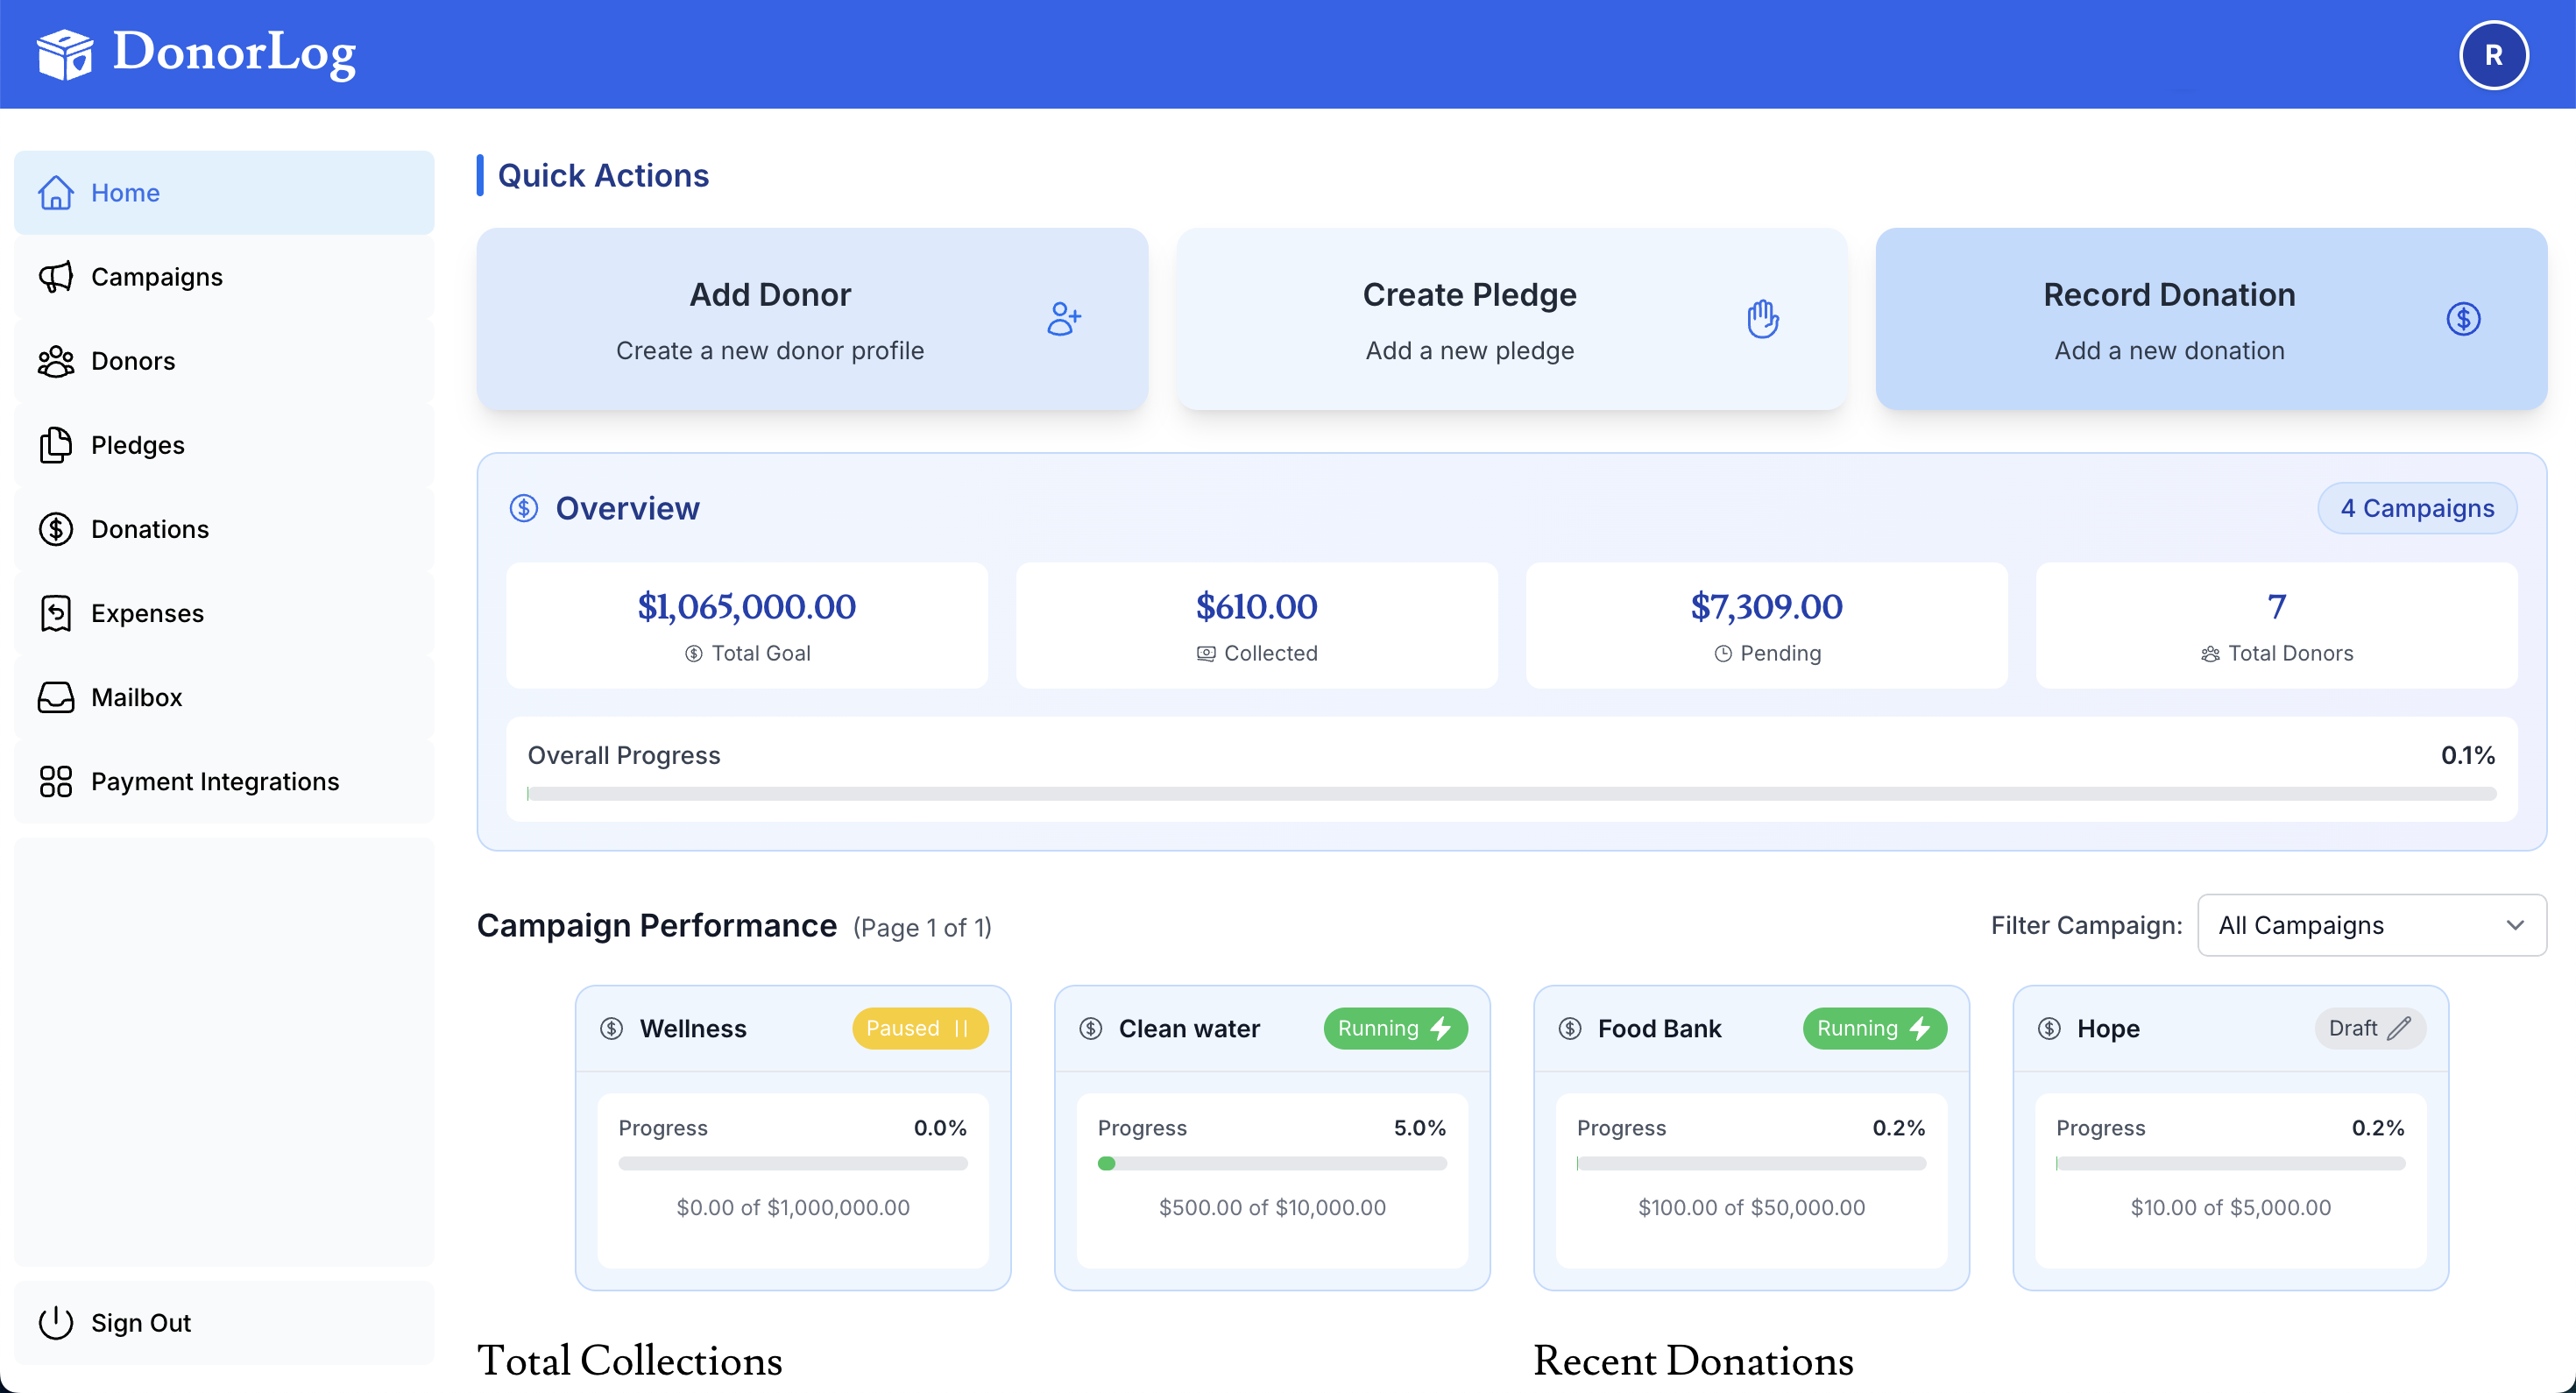
The dashboard provides a quick overview of your key metrics:
- Total Revenue - Sum of all donations across all campaigns
- Recent Donations - Latest donations recorded in the system
- Active Campaigns - Current fundraising campaigns with progress tracking
- Pending Pledges - Pledges awaiting payment with due dates
- Email Activity - Recent email communications and delivery status
- Donor Growth - New donors added over time
- Use the date filters to view statistics for specific time periods
- Click on any metric to drill down into detailed reports
- Export data directly from the dashboard for presentations
Quick Start Guide
1. Create Your First Donor
Before recording donations, you'll need to add donors to the system.
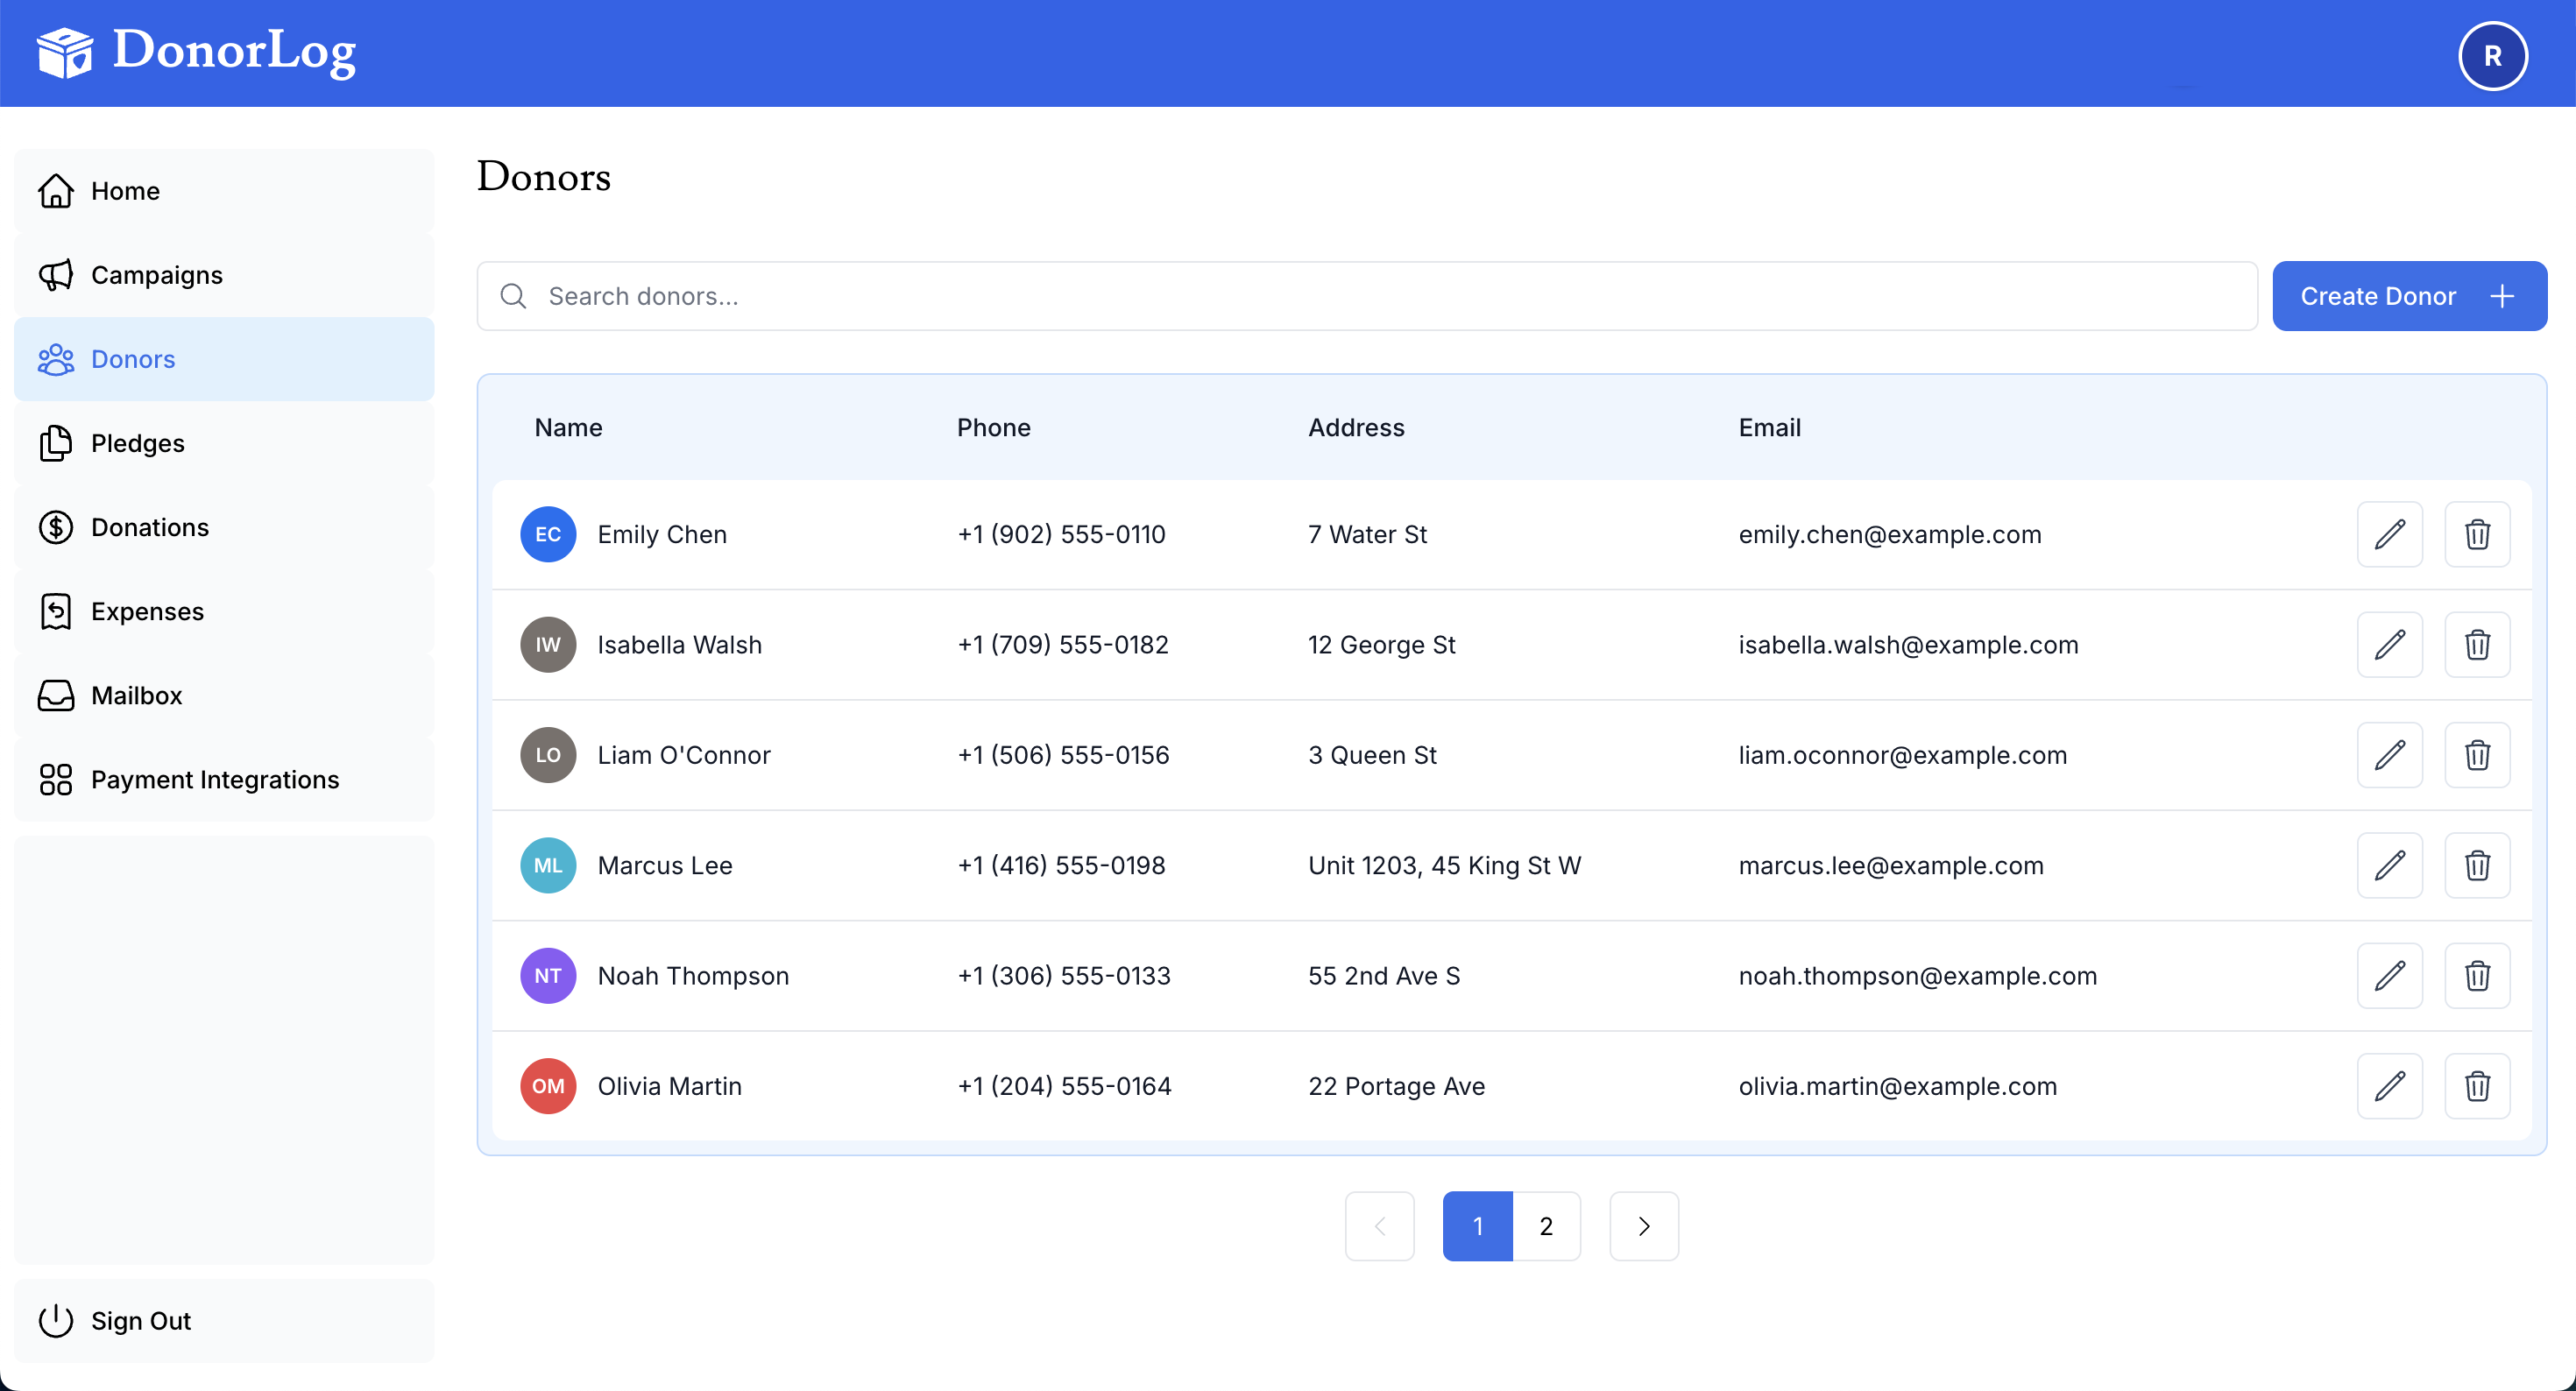
Steps:
- Click "Donors" in the navigation menu
- Click "Add New Donor"
- Fill in the donor's information:
- First Name (required)
- Last Name (required)
- Phone Number (optional, recommended — you can enter "unknown" if not provided)
- Email Address (optional, but recommended)
- Address (required)
- City, Province, Postal Code (required)
- Click "Create Donor"
Email addresses are optional but highly recommended. Without an email, you won't be able to send tax receipts or donation confirmations electronically.
📖 Learn more: Creating Donors
2. Create a Campaign
Campaigns help organize your fundraising efforts and track progress toward specific goals.
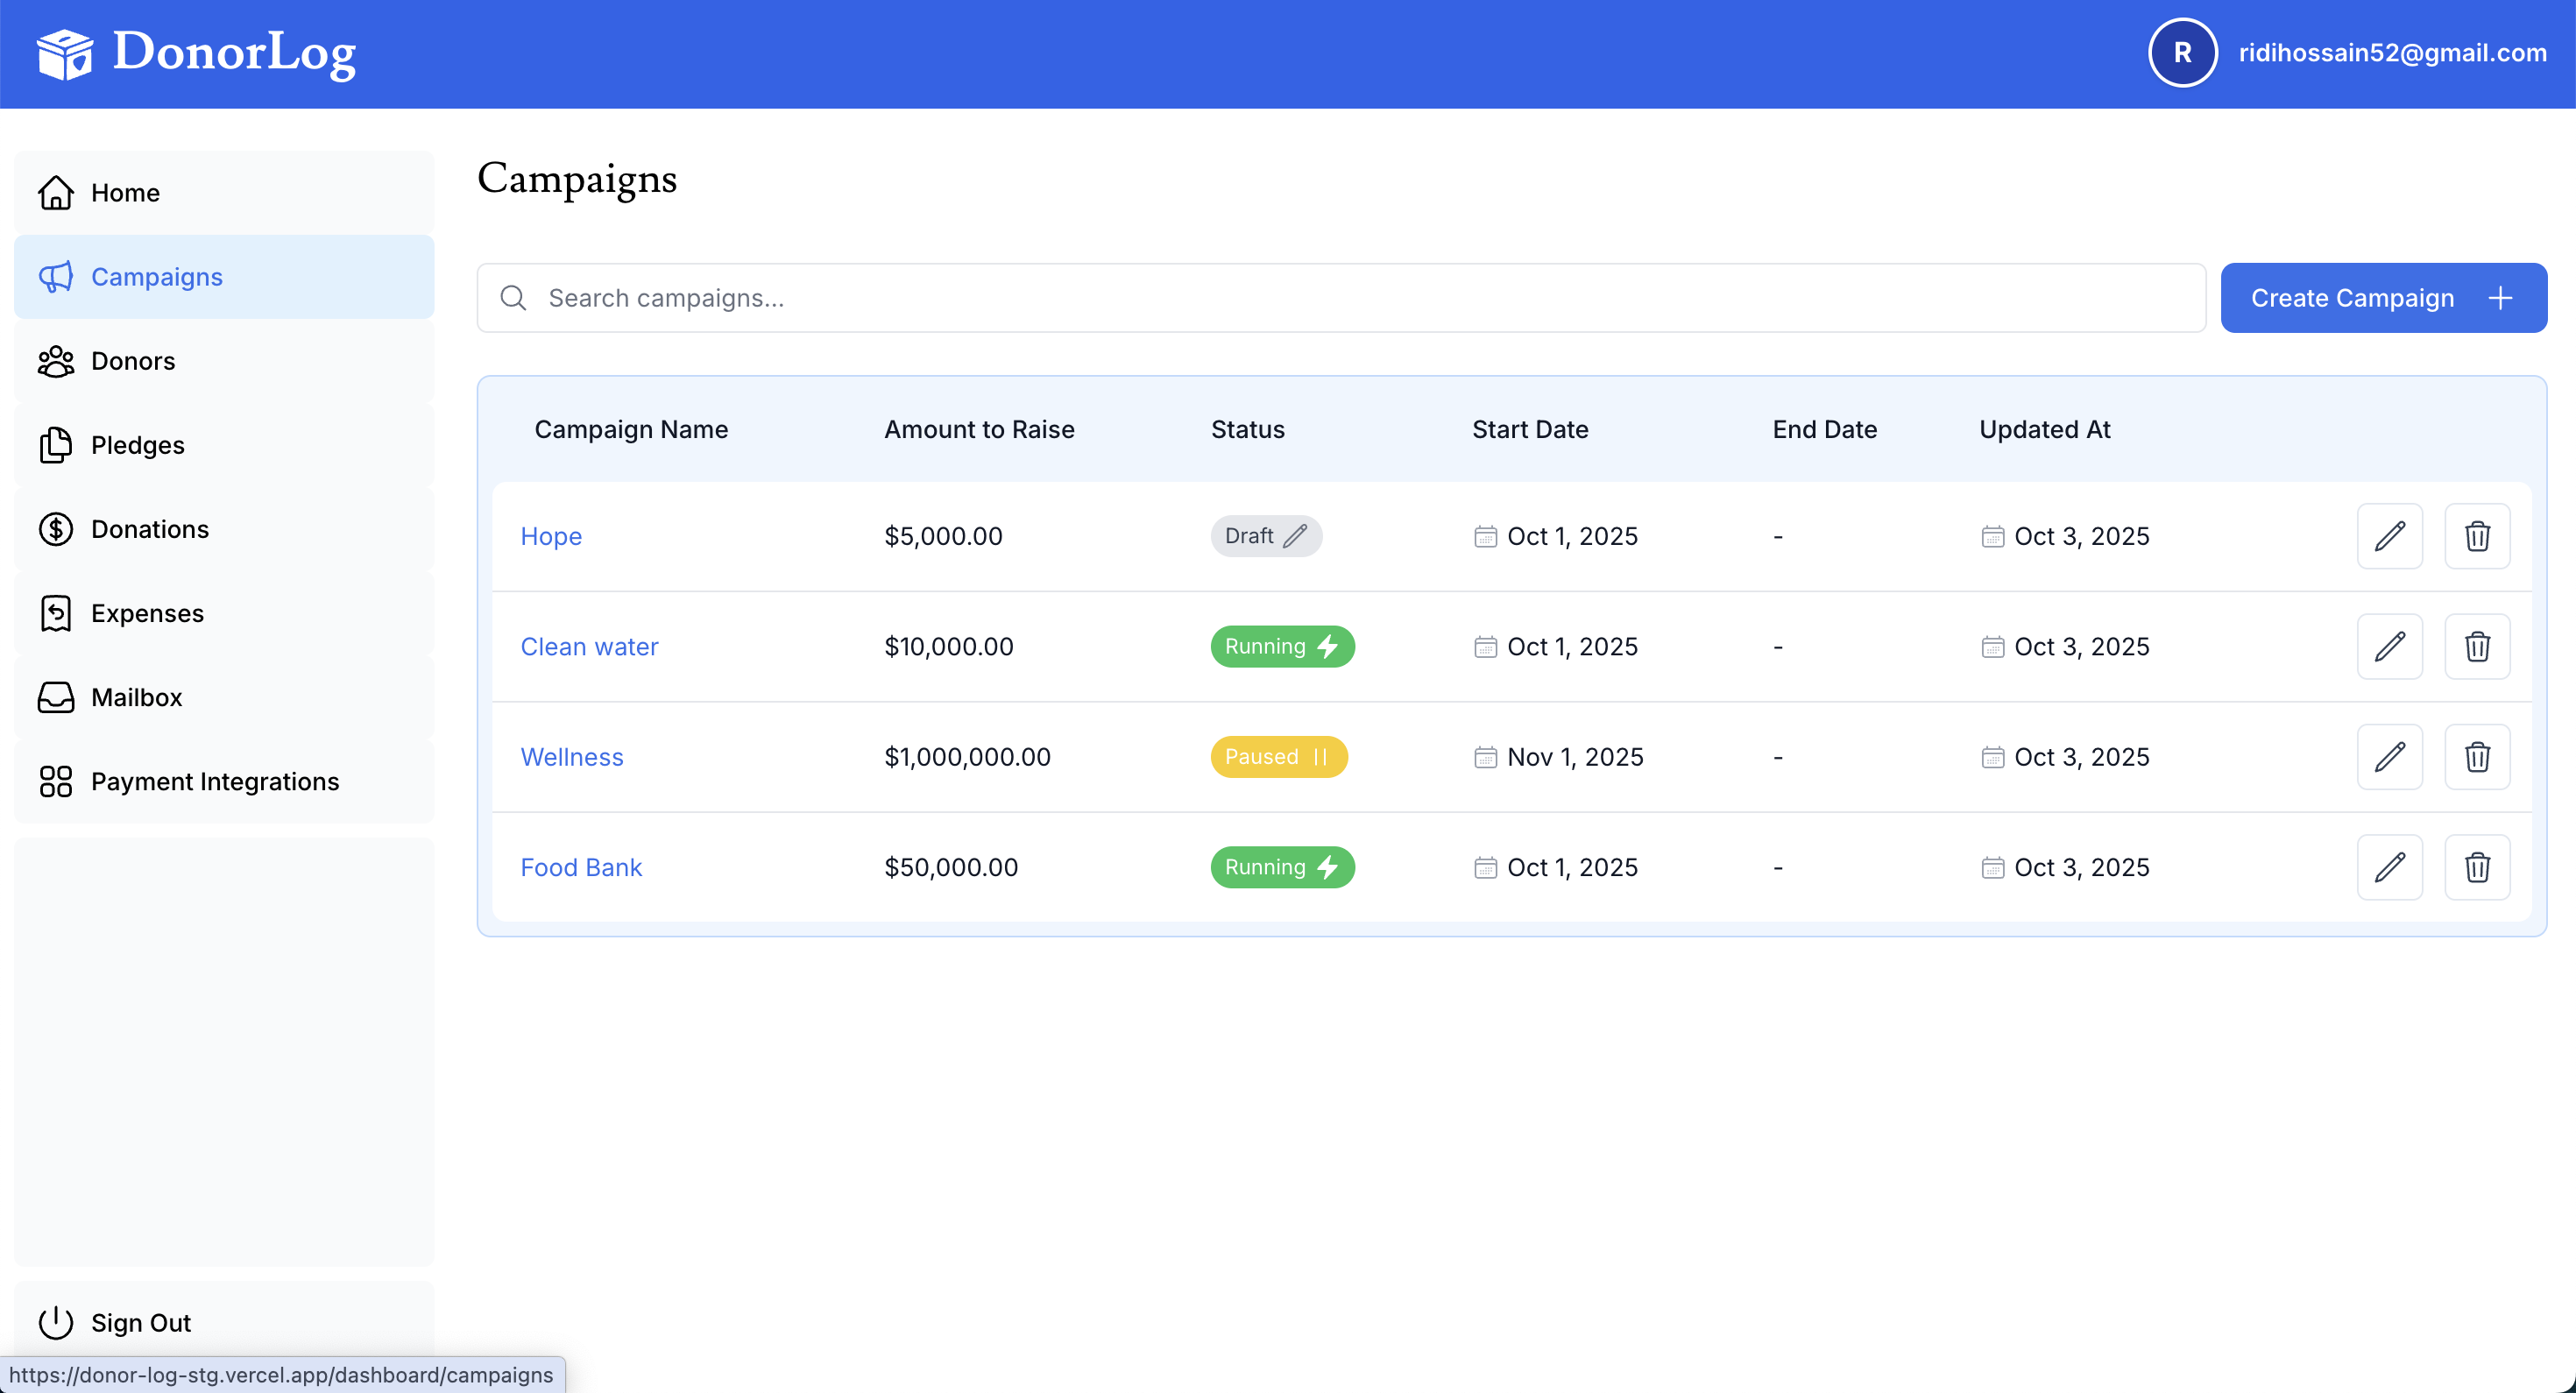
Steps:
- Click "Campaigns" in the navigation menu
- Click "Create Campaign"
- Enter campaign details:
- Campaign Name (e.g., "Annual Fundraiser 2024")
- Fundraising Goal (target amount)
- Start and End Dates
- Description (optional)
- Click "Create Campaign"
- Set realistic goals based on past performance
- Create separate campaigns for different fundraising initiatives
- Use descriptive names that clearly identify the purpose
- Track multiple campaigns simultaneously to compare performance
📖 Learn more: Creating Campaigns
3. Record a Donation
Once you have donors and campaigns set up, you can record donations.
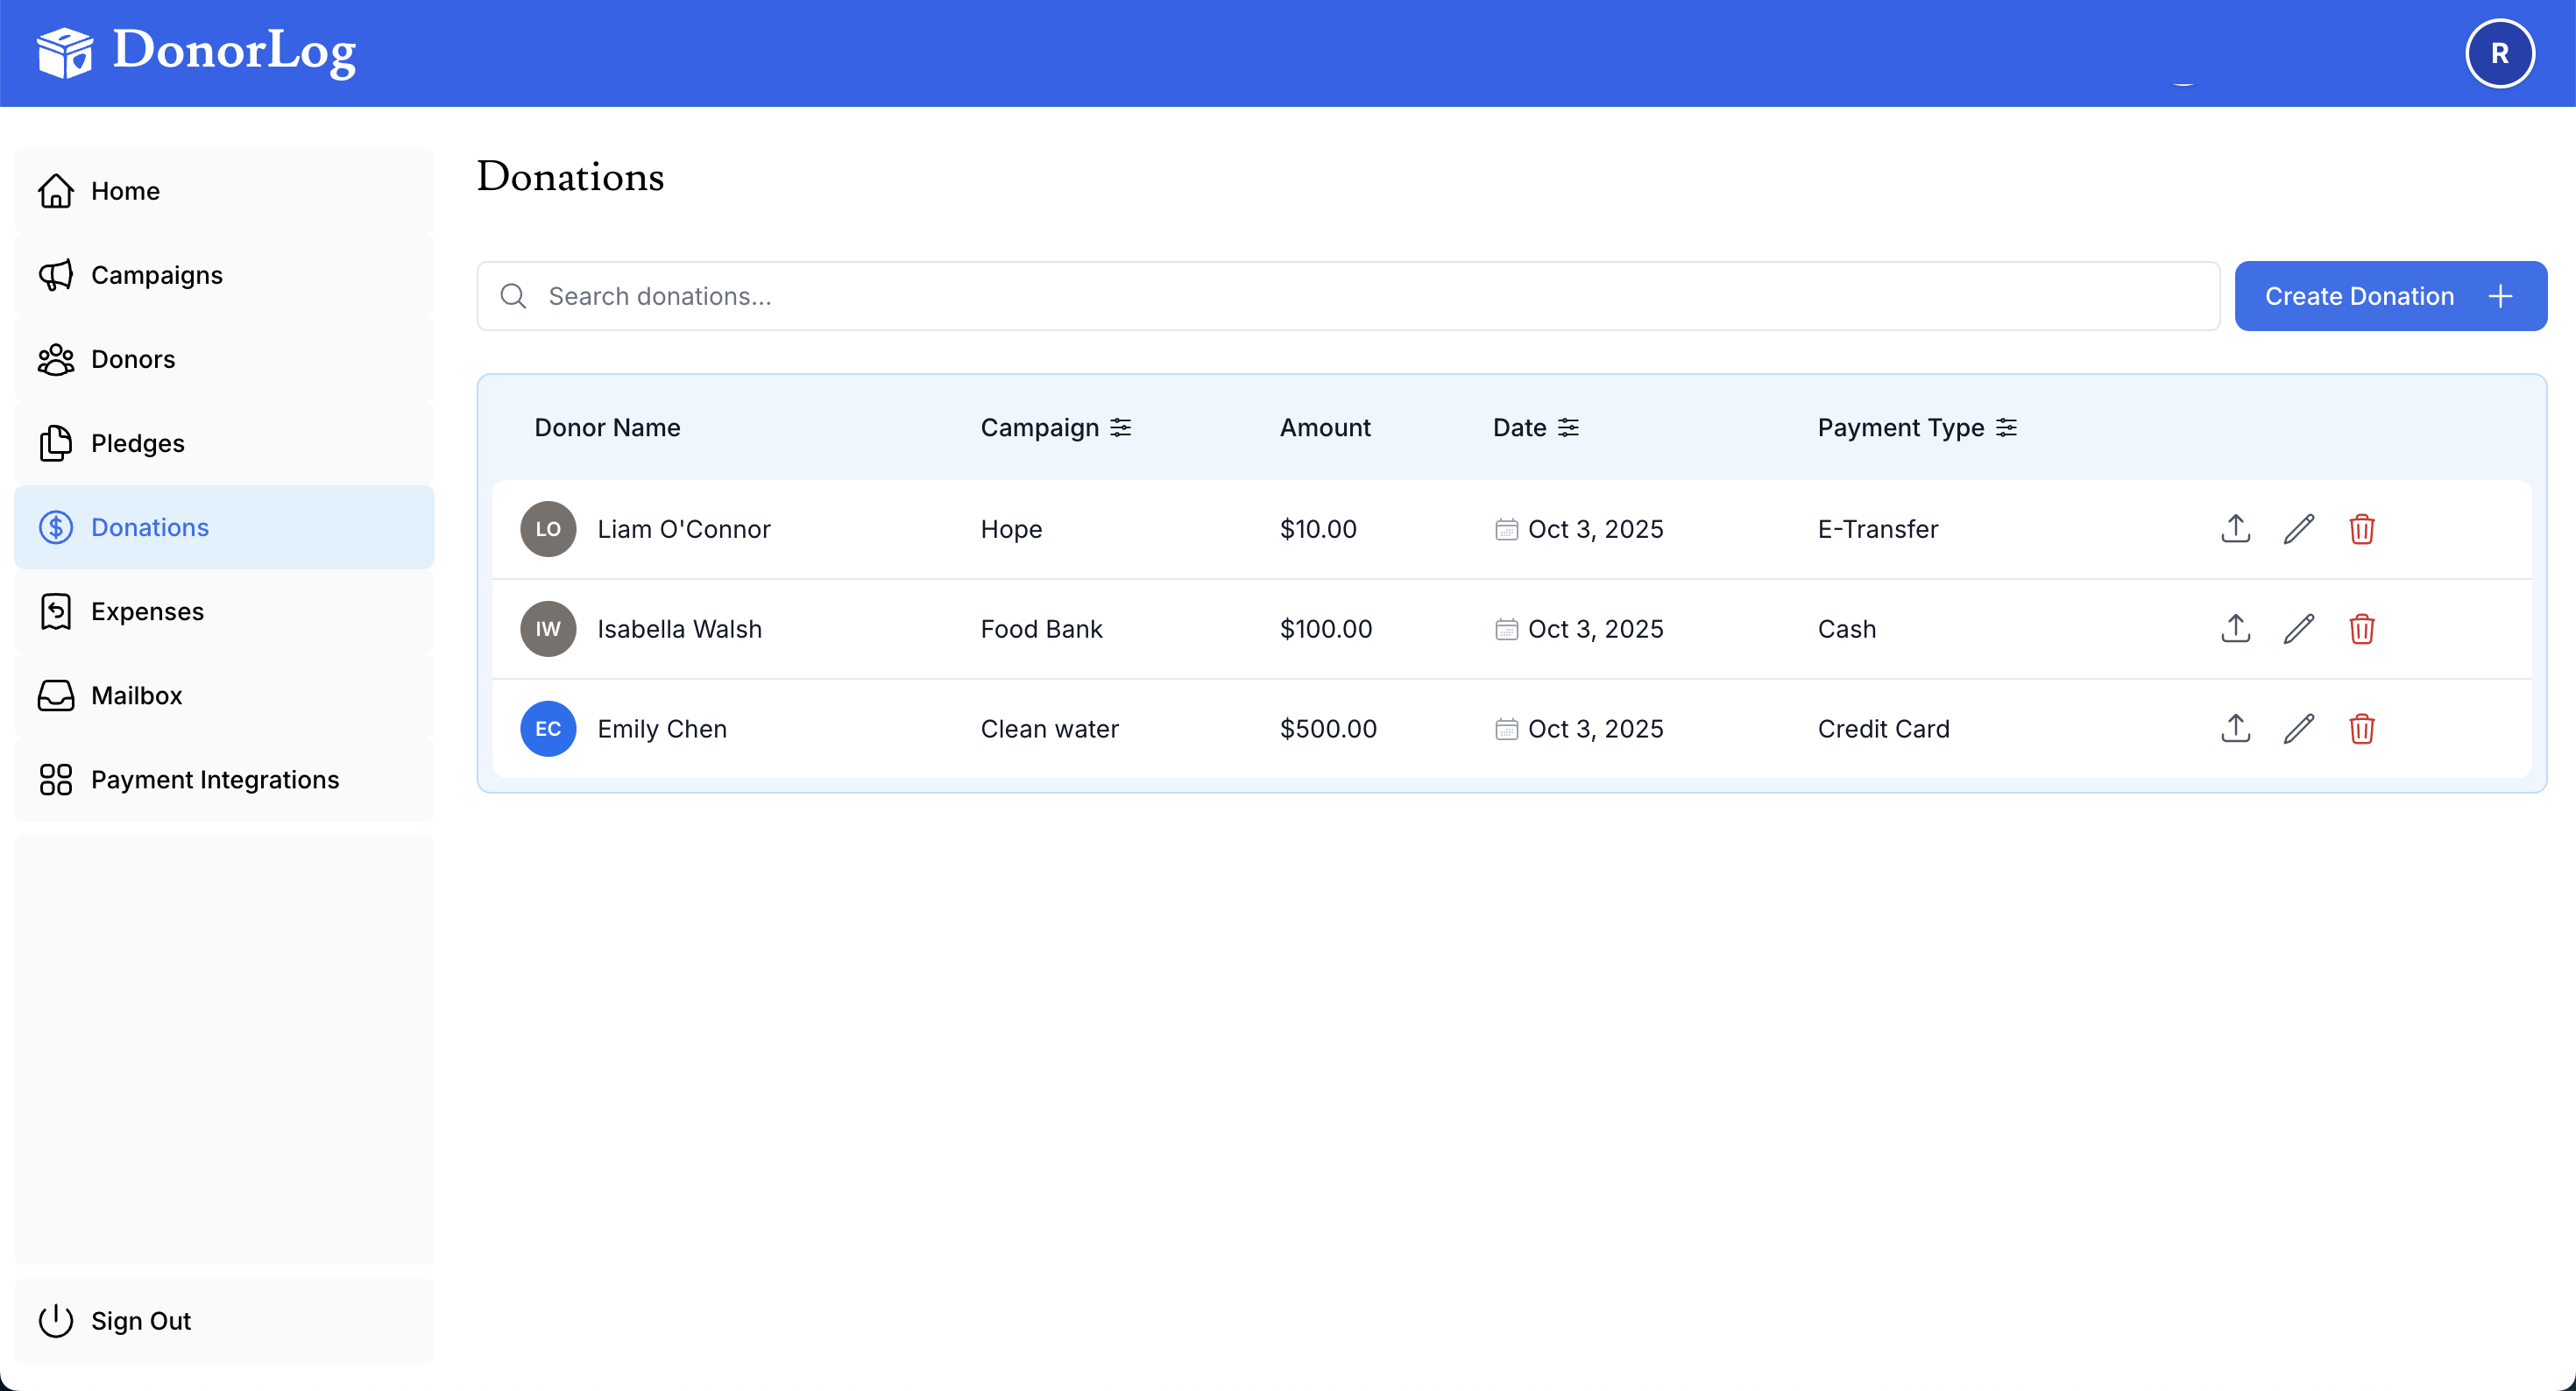
Steps:
- Click "Donations" in the navigation menu
- Click "Add Donation"
- Select the donor from the dropdown
- Select the campaign
- Enter the donation amount and date received
- Choose the payment type:
- Cash
- Cheque
- Credit Card
- E-Transfer
- Optionally upload proof of payment (receipt, screenshot, etc.)
- Click "Create Donation"
When you create a donation for a donor with an email address, DonorLog can automatically generate and send a tax receipt!
📖 Learn more: Creating Donations
4. Generate a Tax Receipt
After recording a donation, you can generate a CRA-compliant tax receipt.
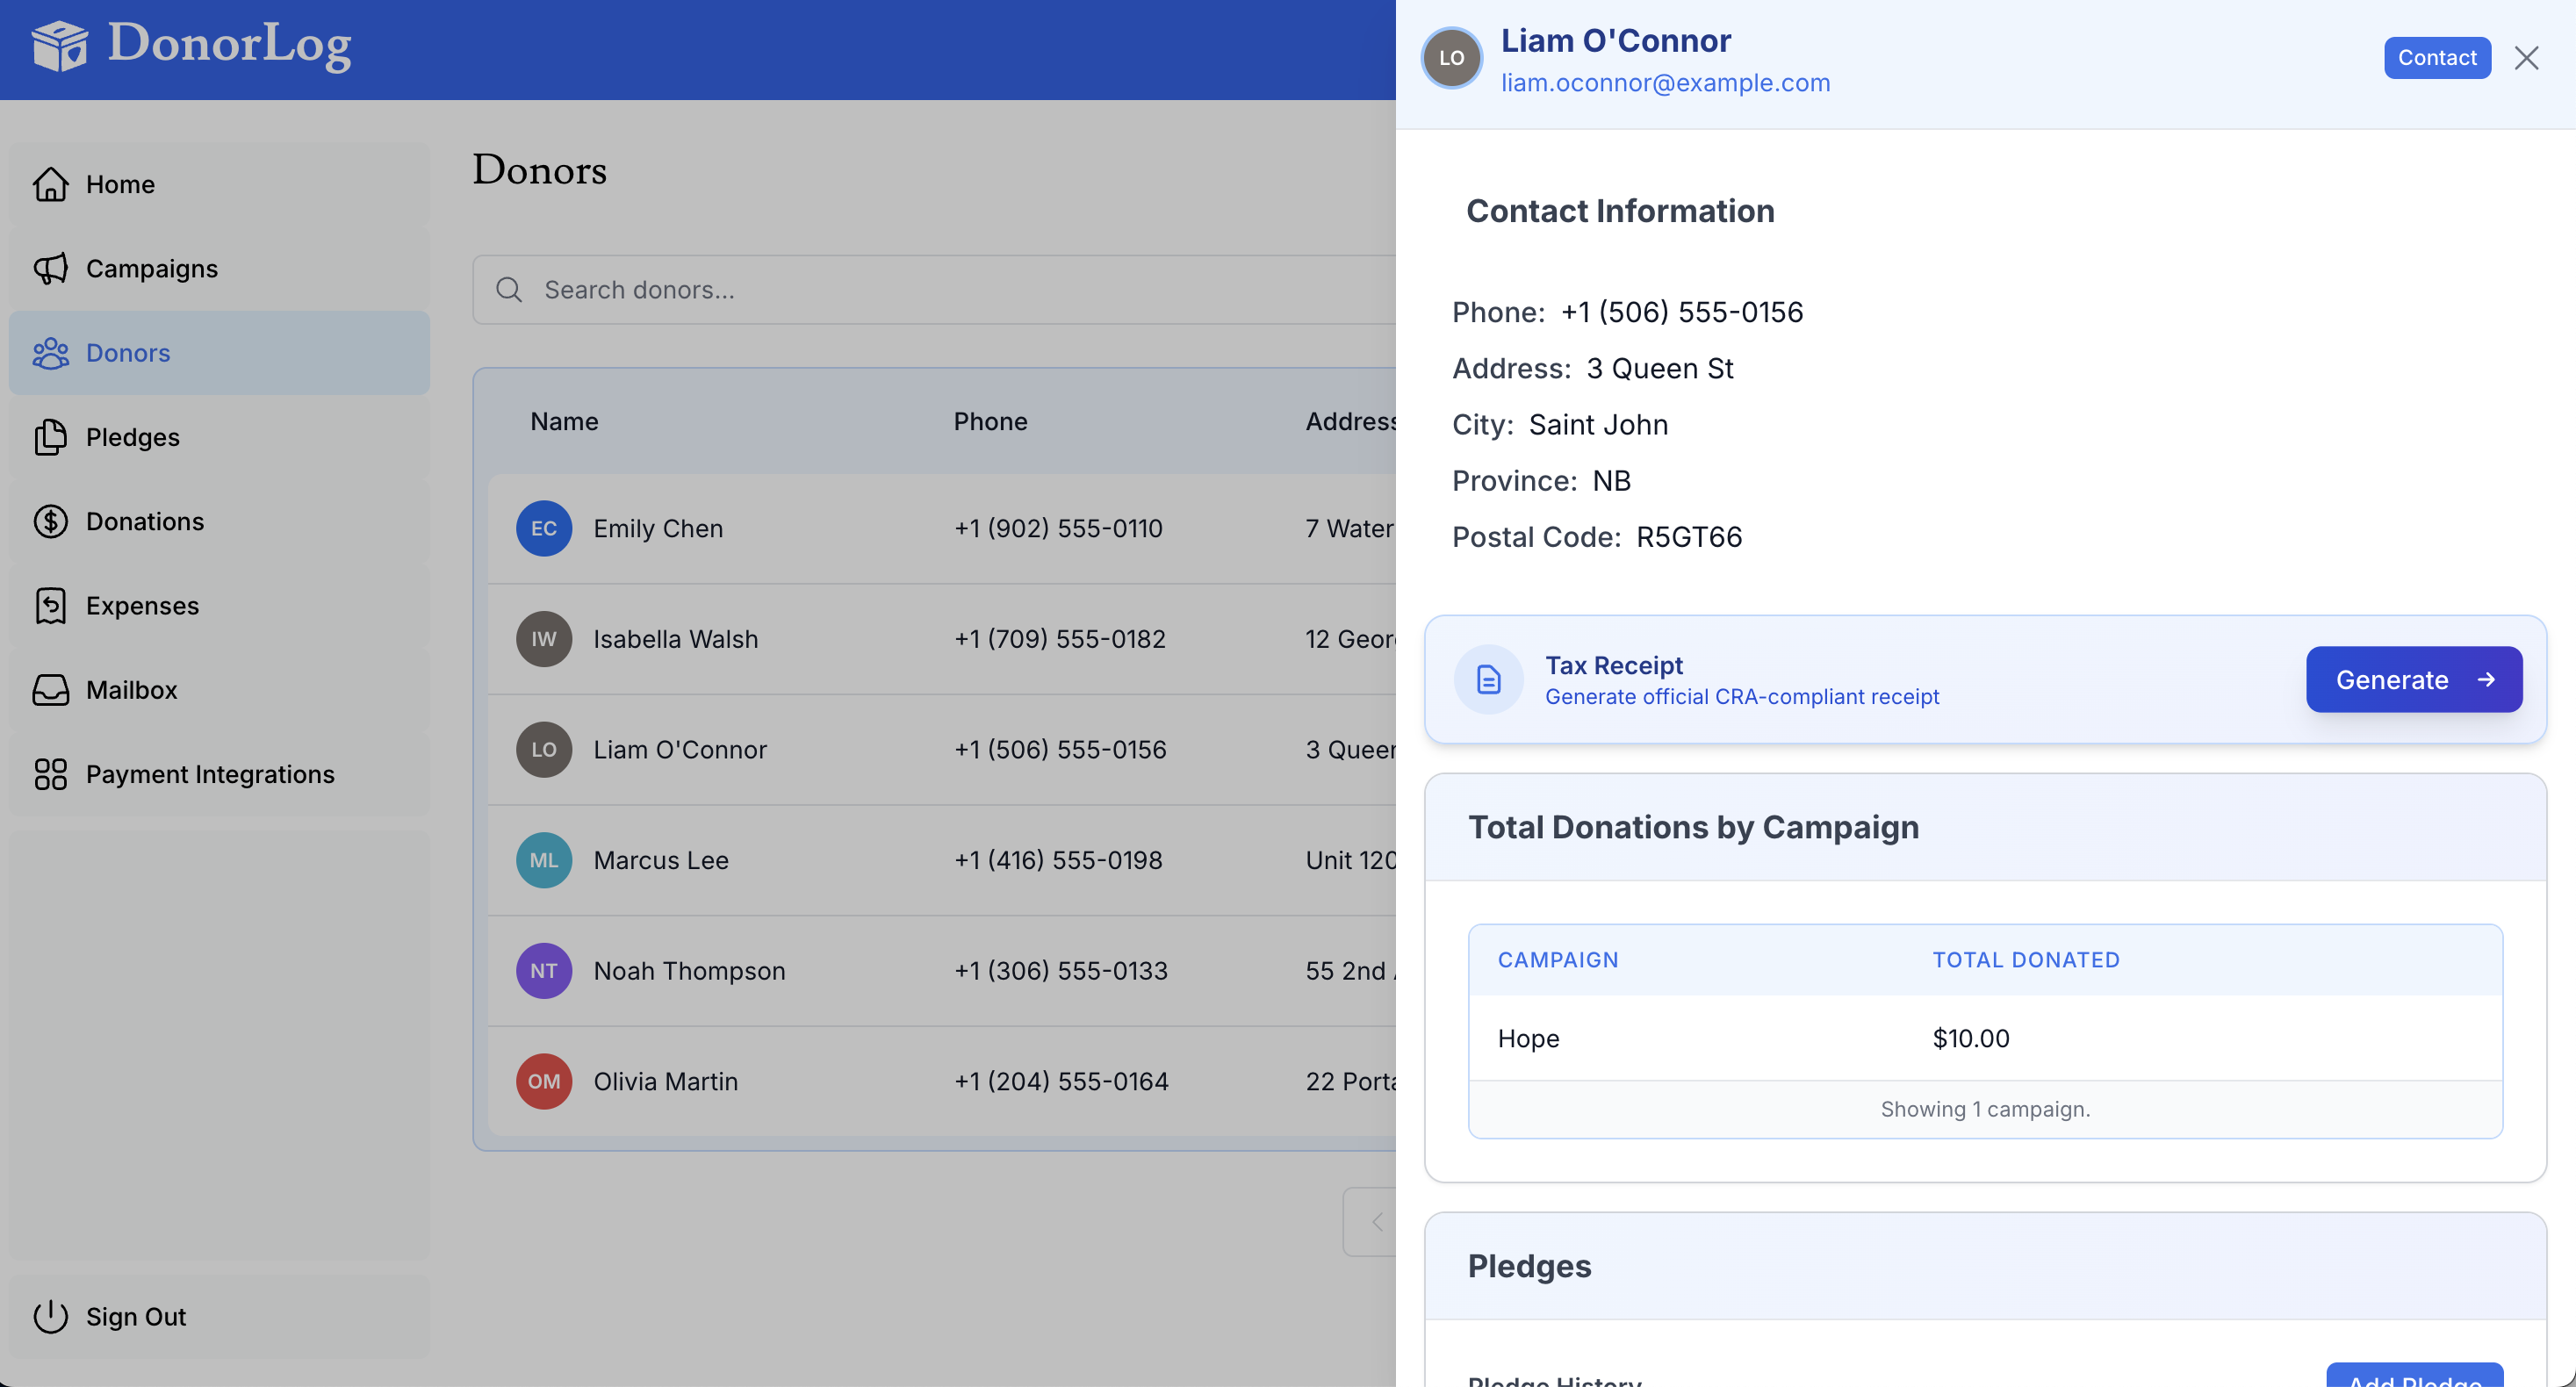
Steps:
- Go to the donor's profile
- Click "Generate Tax Receipt"
- Select the tax year
- Review the receipt details
- The receipt will be generated as a PDF
- Email it directly to the donor or download for printing
All tax receipts generated by DonorLog are CRA-compliant and include:
- Official donation receipt number
- Charity registration number
- Donor's complete name and address
- Date and amount of donation
- Authorized signature
📖 Learn more: Generating Tax Receipts
Common First Week Tasks
Here's a checklist of tasks most organizations complete in their first week:
- Add your first 5-10 donors
- Create your first campaign
- Record at least one donation
- Generate and send your first tax receipt
- Set up email templates for donor communications
- Invite team members to DonorLog
- Configure system settings (organization info, logo, signature)
- Export a donor list for review
Next Steps
Now that you've learned the basics, explore these guides:
Core Features
- Creating Donors - Detailed guide on managing donor information
- Creating Donations - How to record different types of donations
- Creating Pledges - Set up recurring donation commitments
- Payment Types - Understanding different payment methods
Advanced Features
- Email Management - How to send emails to donors
- Campaign Reports - Analyze campaign performance
- Bulk Operations - Process multiple donations at once
- Data Export - Export donor and donation data
Need Help?
If you have questions or need assistance:
- 📖 Check the relevant guide in the documentation
- 👤 Contact your system administrator
- ❓ Review the FAQ section
- 🐛 Report an issue if you find a bug
We're working on video tutorials to help you get started even faster. Check back soon!
Ready to get started? Begin by creating your first donor!